Building better content libraries with Confluence databases
Managing your team's content shouldn't feel like assembling a puzzle with missing pieces. Yet, for many teams, this is a daily reality. Files are scattered across platforms, updates get hidden in sprawling workflows, and teams struggle to find the right assets to move work forward.
Confluence has a better way: databases.
Whether you’re working on blog posts, marketing assets, or project deliverables, Confluence's databases let you house everything in one place. No more copy-pasting or digging through outdated documents — just streamlined collaboration that works for your team and the rest of the company.
In this guide, you’ll learn how to set up a lightweight, flexible, and centralized content library in Confluence, making it easy for teams to discover and utilize content while moving beyond spreadsheets.
What are Confluence databases?
Confluence databases are a smarter way to organize, structure, and share information across not just Confluence, but the Atlassian platform as a whole. They go beyond static tables, offering a central source of curated information that teams can reference and update in real time.
Think of databases as your team’s showcase for completed work, making it easily discoverable and accessible for critical company initiatives. Whether you’re highlighting content, sharing resources, or showcasing achievements, databases adapt to ensure your team’s efforts shine.
Customize fields, adjust displays to match your workflow, and filter or save views for easy access. All updates sync right away, so everyone always has the latest information.
Confluence databases increase consistency and visibility across teams, ensuring everyone stays on the same page and ready to tackle what’s next.
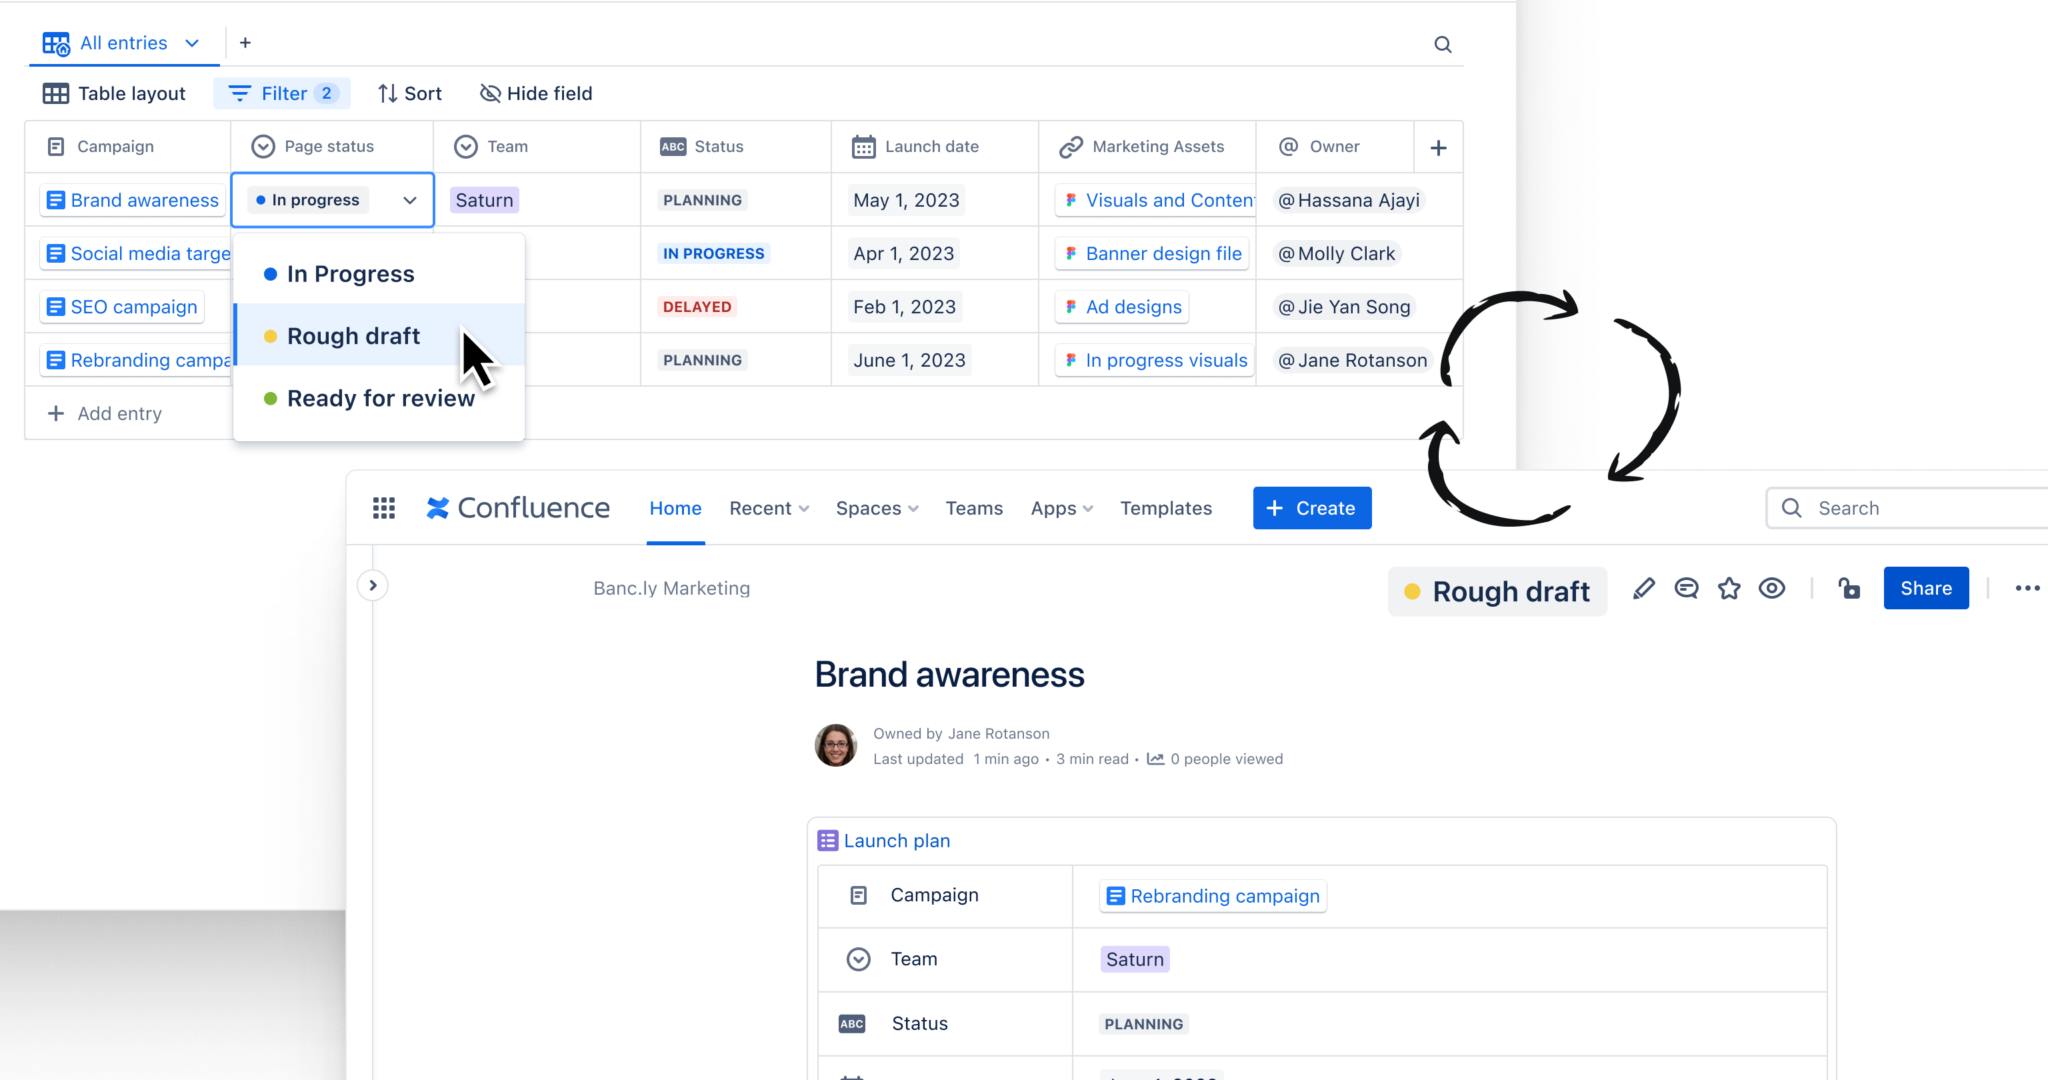
There are a few options for creating your database: use the Create button in the navigation menu, click the + button in the content manager, or type /database while editing a page.
You can also place a database directly where it makes the most sense for your workflow. For example, add a content library to your main campaign page to keep related assets linked and easy to find. Just click the + button next to the page title to create it.
This flexibility lets you create a database that integrates seamlessly into your team’s existing processes, ensuring quick access and easy collaboration.
2. Define fields for your content
Once your database structure is set, it’s time to add fields. Fields define the type of information you’ll track, providing the framework that keeps your content library organized and efficient.
Here are some key fields to consider for content libraries:
- Text fields: Add asset names or descriptions, like “Q1 Marketing Plan” or “Social Media Content Calendar.”
- Tag fields: Categorize content by type — blog, guide, video — to make sorting easier.
- @user fields: Assign owners to each asset so everyone knows who’s responsible.
- Smart link fields: Embed links to files, Confluence pages, or media directly in the database, giving quick access to resources.
These fields give your team a clear view of all the essential details, reducing unnecessary back-and-forth. They also enable powerful search, filter, and sort options to streamline content management.
3. Add and organize entries
With your fields in place, it’s time to fill your database with entries. Think of entries as the rooms within your database, each containing specific content assets.
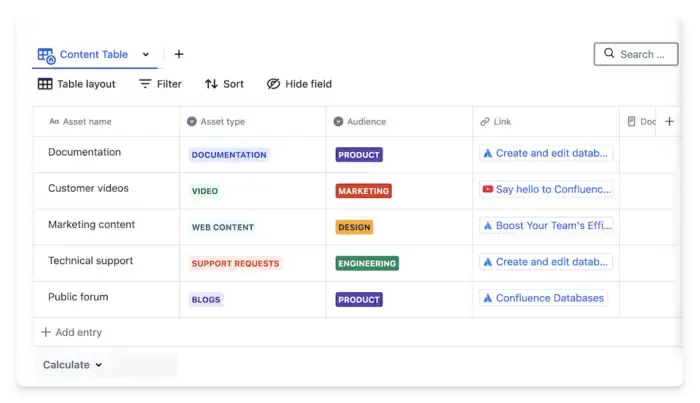
To create an entry, click + Add entry at the bottom of the database. Fill in the fields with key details, such as the asset name, its category, and the team member responsible for it. For example, you might create an entry for a video asset, tag it as “Video,” assign the editor as the owner, and link it to the video file.
Each entry organizes your content into an easily accessible system that helps your team track assets and manage projects more efficiently.
Best practices for using Confluence databases for content management
To make the most of Confluence databases, focus on practices that enhance organization, improve collaboration, and simplify workflows. These tips will help you unlock the full potential of your content library:
Link to related Confluence pages
Integrating your database with related Confluence pages connects content to the context your team needs to work efficiently. Adding links to supporting documents allows team members to access relevant information without navigating between multiple spaces. For instance, linking the database entry for a blog draft to its content brief ensures everyone, from content managers to writers, can easily access the details they need.
To set this up, use the Page Link Field. This feature lets you attach existing pages or create new ones directly from your database in just a few clicks. Select the field when configuring your database structure, or add it by clicking the + button on the right at the top of your database.
Once a Page Link Field is added, linking a page is simple. Just select an existing page from the dropdown or create a new one on the fly. The linked page will appear in the database entry, providing instant access to all its details.

Integrating pages with your database reduces search time and creates a unified system combining content and context. This approach keeps your team aligned, allowing them to focus on creating and collaborating rather than managing scattered details.
Tailor database views for team collaboration
Customizing views in your database helps each team focus on the information that matters most. Confluence databases offer flexible layouts that adapt to different workflows. Use the table layout for a structured view of campaign schedules, the card layout for a visual overview of creative assets, or the board layout to track progress with a Kanban-style workflow.
Saved views take customization further by tailoring the database to each team’s needs, making it faster and easier to find the right content. For example, marketing teams can use a saved view to quickly access campaign assets grouped by type and priority, while sales teams might rely on a view filtered to show customer-facing materials like brochures.
To create a custom view, adjust the layout, filters, and visible fields to match your team’s workflow. Then open the view selection menu, select Add view, and give it a descriptive name, such as "Marketing Dashboard" or "Sales Collateral." Saved views update automatically, so any changes to the database are reflected instantly.

Custom views don’t just streamline workflows — they enhance collaboration by allowing teams to access exactly what they need without distractions. This flexibility helps everyone stay focused and productive, whether they’re managing content creation or tracking asset usage.


